Table of Content
Even in a pressure canner, which gets over 220 degrees, it is too dense for the heat to reliably penetrate the puree to kill any potential botulism spores. Like others I baked my pumpkin, then canned. Did not waste purée time because used blender to make pie. Yes, I know there are plenty of people who have never followed Ball Blue Book recommendations and were just fine. Once I talked to an old timer who had a Great Depression-era mother who canned raw meat with a water bath canner and wax seals– they never got sick.
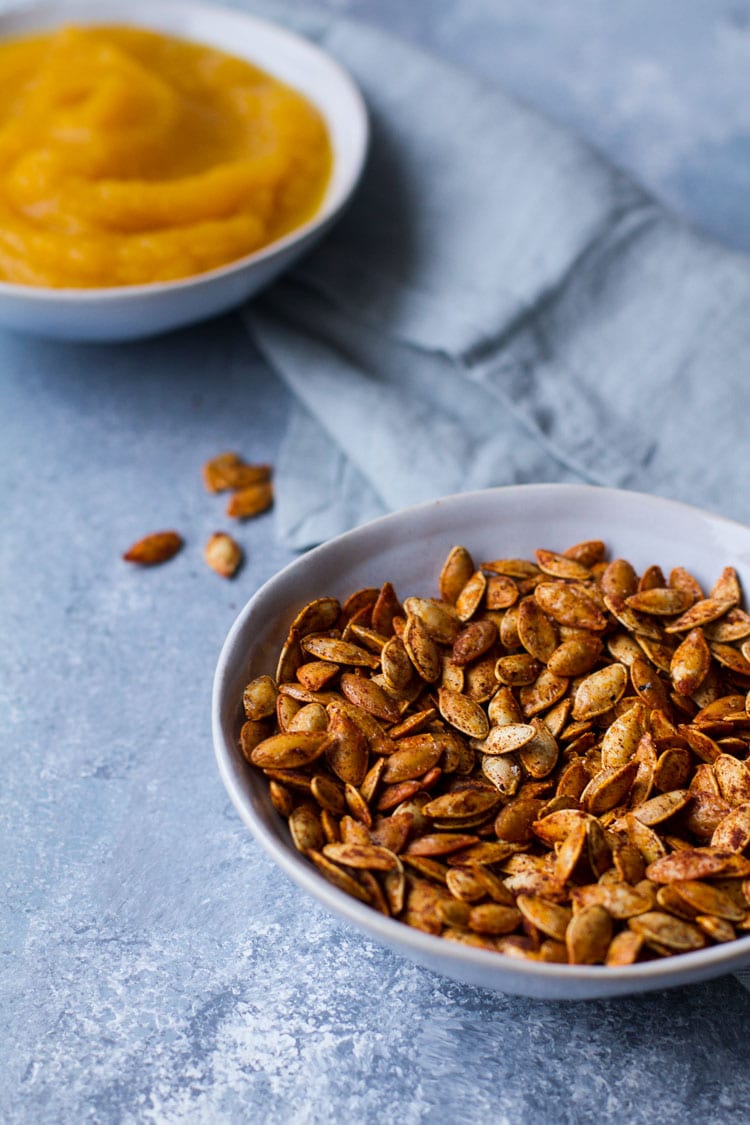
No pumpkin baby food, no smooth pumpkin of any kind. Next, cut the pumpkin in half and clean out the seeds. Pumpkin seeds are amazing so don’t throw them away! Check out my post about 15 amazing health benefits of pumpkin seeds, and check out how I roast my pumpkin seeds for a yummy fall snack or make a delicious pumpkin seed butter. Jack-O-Lantern pumpkin – these are the larger pumpkins that we see at the stores during the holiday season. In this post, we will learn how to can pumpkin.
thoughts on “How to Can Pumpkin Step-By-Step”
A good source of vitamin A and potassium. Beta carotene has antioxidant properties which help the body fight disease more effectively. It is very low in calories, making it perfect for anyone looking to lose weight or even those who want an energy boost without having to eat too much! Other benefits include; it can help maintain healthy vision, boost the immune system, keep bones strong and provide relief from arthritis. Copyright © 2022 by Stine Mari Fiskerstrand.
Pumpkin puree is really thick, and it just doesn’t heat evenly. Every type of pumpkin is a bit different, and different viscosity will affect how the squash heats. Slice in half and scoop out the insides (seeds and "guts").Cut off the stem and blossom ends. Slice each half into 4 to 8 slices depending on the size of the pumpkin. Peel slices and chop into one-inch cubes. But eventually after a few months they may begin to go soft and start to rot, especially if they’re keep in an area that’s room temperature or warmer.
The Two Unbreakable Rules of Canning Pumpkin At Home
Your pumpkin is still good to eat, in fact, some people really like the taste of it caramelized. Then fill the jar with the pumpkin cooking water leaving one-inch headspace. Next, use the bubble remover to remove air bubbles by scraping it along the inside of the jar. Now, use the vegetable peeler to remove the skin of the pumpkin. I am usually able to remove most of it before I start cutting the pumpkin into smaller pieces.
This milk, as the name suggests, helps to prevent pumpkin pie from becoming overly runny. Sugary condensed milk is a type of milk that has been sweetened. Because it’s sweeter than evaporated milk, it can also be used in pumpkin pie. Freeze it in portion sizes according the recipes that you are most likely to make. I also recommend placing a round of parchment paper directly on the surface of the pumpkin to be frozen to protect it from freezer burn on the surface.
Freezing pumpkin
Dates on cans usually pertain to quality rather than safety; that said, if you pass the expiration date, it might not taste as good. Soon, I quickly realized that the oatmeal needed to be sweetened up. I decided to use maple syrup to add just the right amount of sweetness. If you don’t want to use syrup, you can substitute the syrup by chopping up 1/4 cup of dates.

As a result, the filling has a soggy crust as well as a gap between it and the crust. If the pie is too warm in the oven, place it on a hot stone or sheet inside and bake it at 425 degrees for 15 minutes, or until the center of the pie is set. If the pumpkin purée seems a little loose or watery, strain it through a cheesecloth for 1 hour or cook it down on the stove to concentrate it. This method is not recommended if you want to use the pumpkin puree in baking because it adds moisture. But some people might experience allergies after eating pumpkin.
Whether you grow them in your garden or buy them at a market, pumpkin puree is one of the easiest ways to enjoy pumpkins. Peel off the skin and add the pumpkin flesh to a blender or food processor. Instead, I recommend using a pie pumpkin or sugar pumpkin. During the fall and winter seasons, most stores will have them available. Try to pick pumpkins between 3-6 pounds — that’s usually when the flesh is best.
Place the pumpkin on the chopping board stem side up, make sure that the squash is sitting well on the chopping board. Scoop out the seed and fibers from the pumpkin halves with a spoon or ice cream scoop. Save the pumpkin seed for later and discard the fiber. Pumkins are squash-like fruits native to North and Central America. The fruits come in a variety of different colors, including red, orange, yellow, black, and green. Pumkins are actually the fruit of the pumpkin plant.
For example, a quart jar made about 2 cups of finished puree, or roughly 1 pumpkin pie’s worth. Slice in half, remove seeds and strings. Slice halves into 1-inch strips, then chop into 1-inch cubes. Use a paring knife to slice the peel off each cube . Commercially canned pumpkin is made from a consistent variety, and it’s a very consistent thickness before it goes into the can.
I still have a lot of pumpkin puree in my freezer and I'm totally making a new batch of parmesan pumpkin pasta really soon. Let them roast for approximately minutes or until the skin of the pumpkin/squash gives in if you press it with a fork . Let the pumpkin/squash cool for 5-10 minutes before you peel the skin off with your fingers or a knife.
Fill jars up, leaving a generous one-inch headspace. Pour the boiling water from your pot over top of pumpkin cubes and leave one inch of headspace. Fill jars with hot tap water to keep them warm . They don’t need to be sterilized in the canner because the high temperatures achieved when pressure canning are enough to kill all bacteria. To be clear, “puree” also refers to pumpkin butter, pumpkin pie filling, mash, mush, or anything that’s not a 1×1 inch chunk.
Soak your pumpkin in bleach and water before carving it. Remove all seeds and strings from your device by doing so. To remove the seeds and strings from the pumpkin, cut it in half with a sharp knife.
Let jars sit in the canner with the lid off for another 10 minutes. Then remove and let cool completely on the counter before storing. Transfer pumpkin cubes to a large, stainless steel pot and cover with water. Bring the water to a boil and boil for 2 minutes. When pumpkin turns brown after processing it usually means that you processed it at a too-high temperature. The sugars in the pumpkin caramelized during the canning process.


No comments:
Post a Comment